A simple 'How To' guide
GLOSSARY OF TECHNIQUES
A simple 'How To' guide
{All glass used in my studio is 96coe}
GLOSSARY OF TECHNIQUES
A simple 'How To' guide
{All glass used in my studio is 96coe}
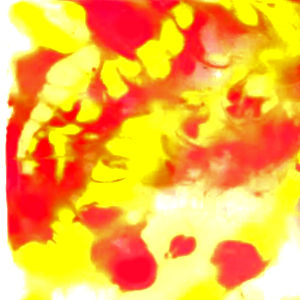
POWDER WASH
Powder Wash is the art of mixing Sure Stik with powdered glass to the consistency of melted ice cream. Apply it to a base glass with a small spoon in a vertical or horizontal direction, single color, multiple colors, swirls, dots, lines, creating a pattern. While the powder is still liquid, tilt the tile in different directions to spread the glass into a pleasing design, blurring the lines between colors. Let dry and fire to a full fuse.


POWDER
FINE
MEDIUM

POWDER
FINE
MEDIUM
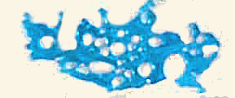
GLASS LACE
Glass Lace is made by taking frit or powdered glass and laying it out on a piece of fiber paper in the kiln. Sift the powder in three layers, horizontal, vertical and diagonal and fire to a high fuse temperature so that when you observe the powder it has holes in it. Use powder, fine or medium frit for various textures.
GLASS LACE
Glass lace is made by taking frit or powdered glass and laying it out on a piece of fiber paper in the kiln. Sift the powder in three layers, horizontal, vertical and diagonal and fire toa high fuse temperature so that when you observe the powder it has holes in it. Use powder, fine or medium frit for various textures.

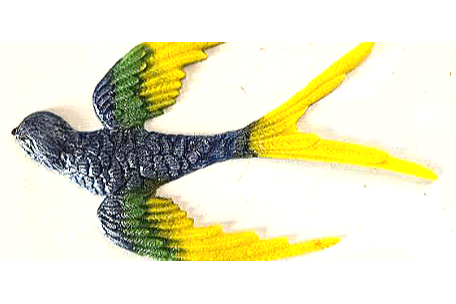
FRIT WAFERS
Frit Wafers are made by using powder in Mylar stencils or making your own stencils out of poster board. Take 2 sided tape and adhere to two corners of the stencil. This will be used to lift the stencil at the end of the process. Lay the stencil on a piece of fiber paper sifting powder into the stencil no higher than the outline so the shape is still visible when the powder completely fills the space. Carefully and slowly lift the stencil by the tape. Fire to a full fuse. Place the frit pieces onto your pre-fired tile and fire to a tack fuse.
FRIT WAFERS
Frit Wafers are made by using powder in Mylar stencils or making your own stencils out of poster board. Take 2 sided tape and adhere to two corners of the stencil to lift the stencil at the end of the process. Lay the stencil on fiber paper sifting powder into it no higher than the outline. Carefully and slowly lift the stencil by the tape. Fire to a full fuse and place the wafers onto your project firing in a tack fuse.

GLASS CASTING
There are a few methods to casting glass. Because my castings are relatively small, under 12", I make a silicone mold. Filling the mold with various colors of powder mixed with water I freeze it for at least 24 hours. When the glass is solid I remove it from the mold and immediately put it in the kiln, firing to 1300 degrees. This casting is added as a design element to my project.
GLASS CASTING
There are a few methods to casting glass. Because my castings are relatively small, under 12", I design a silicone mold filling it with various colors of powder mixed with water and freeze it for 24 hours. When the glass is solid I remove it from the mold and immediately put it in the kiln, firing to 1300 degrees. When cool, the casting is added as a design element to my project.
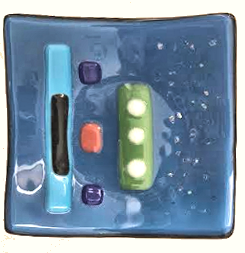
FUSING & SLUMPING
Basic fusing and slumping is a relatively easy technique and as you progress in the art there are more advanced techniques and firings schedules to learn. To begin, you choose the mold, trace the mold onto the glass for correct size and shape, cut out the glass, decide on a design, pick out and cut all your design pieces, layer the base piece of glass with the cut glass. When finished, fire to a full or tack fuse and then place the fused glass into the mold and slump. The glass will soften and take the shape of the mold.
